Search This Blog

Showing posts with label photography. Show all posts

Sunday, 5 September 2010

lara ferroni

http://www.laraferroni.com/
http://www.spareroomseattle.com/


ABOUT


I didn’t really mean to become a photographer. But with the first photo that I took of a batch of homemade raspberry scones, I knew I was a goner. My family quickly learned to ask first before digging in with their forks as I became completely snap-happy around any kind of food. Family vacations were hijacked to make special trips to particularly photogenic markets or restaurants.
Luckily for me, and my family, this passion quickly turned into something a bit more useful… beautiful images of food, travel and life for editorial publications and advertising.
I keep a very small shop. My studio is located in my light-filled house. I mostly do my own food and prop styling. I love to use natural sunlight light. The sense of home and wonder you see in my photos comes from the way I work and the fact that I am a home cook and that I shoot in a home (be it one with a really large selection of tableware).
You can find my stock photos on Getty Images and StockFood.
I’m also on Twitter:
Still Life With Tweets for chatter about food photography and styling announcements and inspirations.
LFerroni Tweets for everything else.
Have a food photography question? Looking for a photographer? See a site problem?Mail me!

composition


Before I dove head first into the world of photography (there was no toe-in-the water transition period for me), I hadn’t ever considered or learned about composition. I thought it only had something to do with painting. If I was going to take pictures of real life, I didn’t imagine that I would be saying to the man running for the bus, “excuse me, could you please step into this third here?” I disregarded composition entirely. Then there came a point where I began intuitively setting my manual settings without much thought. I was suddenly left with loads of time on my hands while shooting to, not necessarily bother my subjects with moving around in a scene, but to move myself appropriately and be quick enough to catch something in the split second when it was naturally well composed.
So if you are like me and you haven’t yet considered composition, here are a few rules to get you going. Naturally, rules are made to be broken. But you can’t break the rules until you have mastered them. More on that another time. Here are four hard and fast rules of composition I can’t live without:
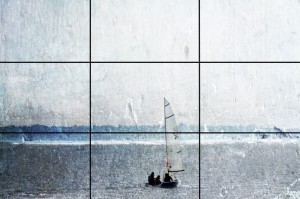
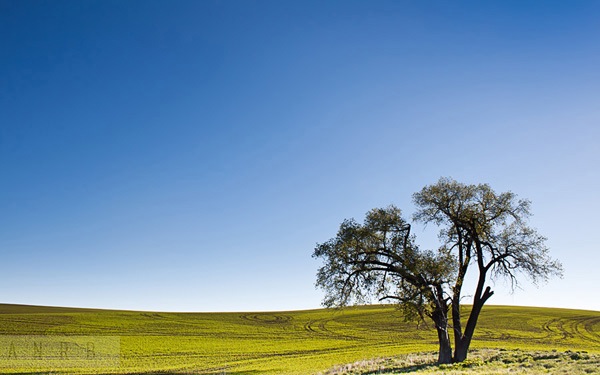
Thirds – This may be the most widely known rule of composition among photographers. There’s even an option in most DSLRs to switch on a visual grid in your viewfinder. This rule states that for an image to be visually interesting, the main focus of the image needs to lie along one of the lines marked in thirds. For example, according to this rule, a horizon shouldn’t be smack bang in the middle of a photo, but on the bottom third. A single tree in a field should be aligned with one of the two vertical lines.
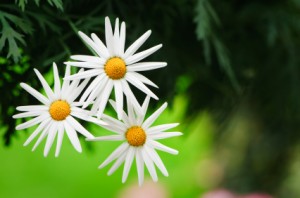
Rule of odds – The rule of odds states that images are more visually appealing when there is an odd number of subjects. For example, if you are going to place more than one person in a photograph, don’t use two, use 3 or 5 or 7, etc. Of course this is a pretty silly notion for an engagement shoot, right? Or a wedding shoot. Or a family with only two kids. But when possible, when you are not just shooting real life but composing images (still life, family groups, flowers) remember the rule of odds. Studies have shown that people are actually more at ease and comfort when viewing imagery with an odd number of subjects. I’d be very interested to know the different opinions readers have for why that is. I’ll share mine in the comments below.

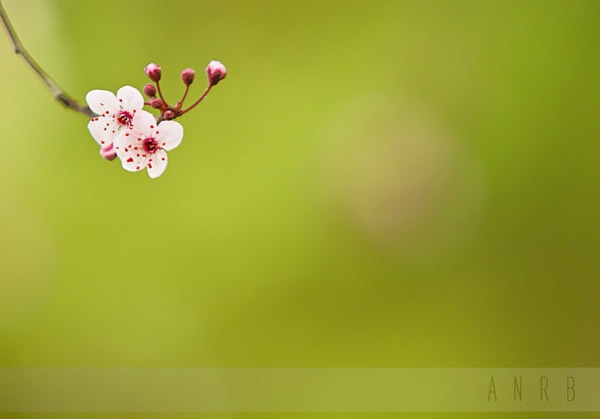
Rule of space – I used to get this rule mixed up with the rule of thirds. The rule of space probably comes naturally to you and you don’t even know it’s a rule of composition. The rule of space says that in order to portray movement, context and the idea that the photo is bigger than just the part that you’re seeing, you need to leave clutter free ‘white’ spaces. For example if you’re photographing a runner, give him a space to run into. Don’t photograph him with all the space in the world behind him because this doesn’t help the viewer  picture the forward motion & the space he has yet to run. If you’re making a portrait of a woman laughing at something not in the photo, leave space in the direction where she is laughing. This leads the viewer to wonder what’s just beyond the boundaries of the photo. What is she laughing at? The reason I got this mixed up with the rule of thirds is that naturally, when giving your subjects space, they will be placed in a third of the photo.

Viewpoint – Often referred to as POV, point of view is the most basic of composition rules. And it’s as simple as clicking the shutter. You are  your viewer. Your camera is their eye. If you photograph a dog at eye level, your viewer will be viewing the dog at eye level (which gives the idea/feeling of equality). If you photograph a dog from below, your viewer will be seeing the dog from below (a low shot gives the notion of dominance). If you photograph a dog from above, you are projecting a feeling of your viewer’s superiority in relation to the dog.


Read more: http://www.digital-photography-school.com/four-rules-of-photographic-composition#ixzz0yfeiPgul


“Studies have shown that people are actually more at ease and comfort when viewing imagery with an odd number of subjects. I’d be very interested to know the different opinions readers have for why that is.”
My guess is that it has to do with a subconscious awareness of primes (moreso than simply odd numbers) – indivisible numbers provide a naturally defined subject, when we introduce multiples we are overpopulating an image with unecessary subjects and lose focus on the narrative we are trying to convey.
1,3,5,7,11,13,17,19,23,29,31,37,41,43 etc.

My (figurative) eye seems to be a bit off when judging for thirds. Usually I end up with something at the right or left quarter, or much closer to the center (which is much more often). Or in vertical orientation, usually within the middle third.
The horizontal placement, though, seems to more often work if the subject is large, as long as the subject is not centered, and perhaps the rule of space is applied.
Another aspect of the rule of space: If the photograph is apparently some(one/thing) that just just STOPPED moving, leaving more space behind lends the same mystery and/or interest as photographing a moving subject with space in front of it.
A quick example: I recently photographed a butterfly, and with my bad aim to thirds, landed its feet right ON the intersection of the lower and left thirds, the butterfly facing left. It had just extended its proboscis into the flower, leaving a short story: The butterfly had flown in from the right, and landed on the flower to drink. Had I intersected the thirds lines in the butterfly, it would have been squished to the edge of the frame, but that’s not the point. If I had framed it on the right in stead of the left, it would look like it was trying to go somewhere rather than having stopped to sip nectar.


Read more: http://www.digital-photography-school.com/four-rules-of-photographic-composition#ixzz0yff2esNJ

10 Landscape Composition Tips: Illustrated with Pictures from Eastern Washington


Composition for a photograph is like a screenplay for a movie. If the picture isn’t composed well, it won’t strike a cord with the viewer regardless of the technical expertise or the story being told. Composition skills improve over time with constant practice. Here are some of the basic composition tips with a picture to illustrate each of those tips. The example pictures were all taken in one day while driving through Eastern Washington. These tips will help train your eyes to see the frames, an important point if you want to take great pictures.


1. Remember rule of thirds

A basic tip to remember if you want to improve your composition skills. The human eye is generally drawn to a point one third of the way from the top, bottom, right or left of any image. Keep this in mind as you work on your composition. Read more about the Rule of Thirds.


2. Negative space is your friend

Landscape Composition 22.jpg
Don’t always try to fill the frame. Negative space can be used to your advantage. Remember, it is just as important as the main subject.


3. Embrace Geometry

Landscape Composition 33.jpg
Train your eyes to look for lines, patterns and shapes. They give structure to your picture and help highlight the three dimensional quality of your subjects. Lines lead the viewers’ eyes into or out of the picture. Find a subject for the center of attraction and then find lines that lead to it.


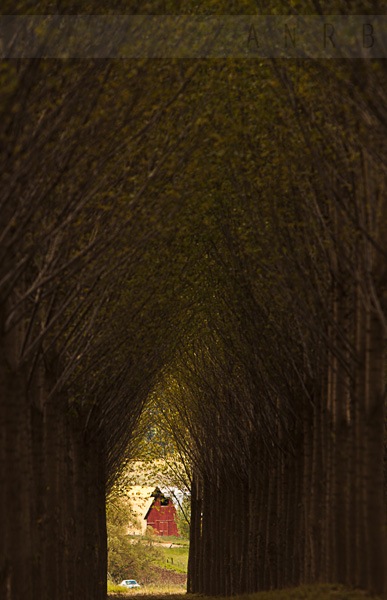
4. Frame within frame

Landscape Composition 44.jpg
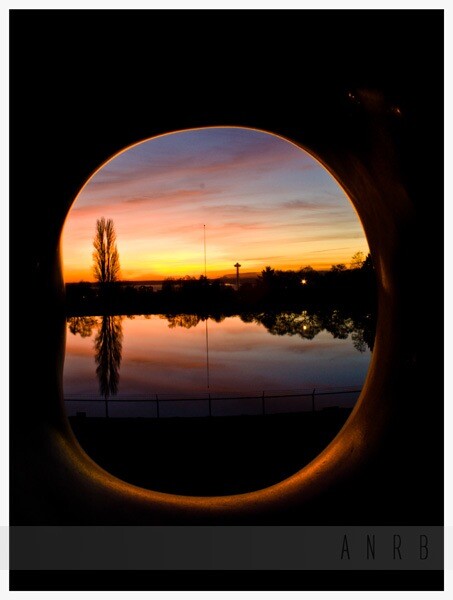
Used effectively, foreground framing directs the viewer’s eye right to the subject. Look for frames of different shapes and sizes. They don’t always have to be windows and fences. They could be big trees as in this example.

5. Avoid horizon in the middle

Landscape Composition 55.jpg
Keep your horizon level and keep it out of the center of the picture. If the sky is more interesting pull the horizon down and if the land is more interesting push the horizon up.


6. Inject life to your picture

Landscape Composition 66.jpg
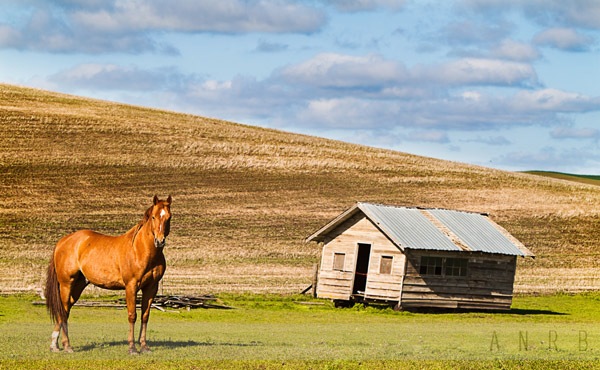
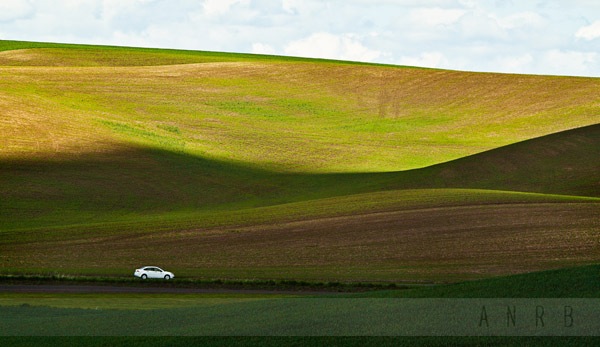
Try to place a living being in the picture. It shows dimension and emphasizes the scale of the frame to the viewer.


7. Merges breaks a picture

Landscape Composition 77.jpg
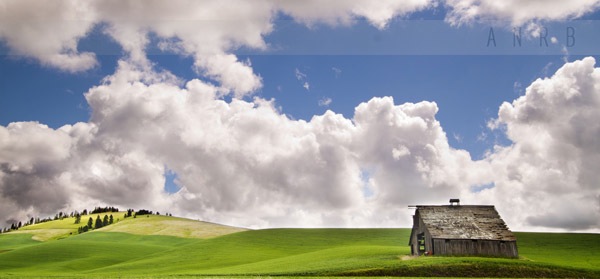
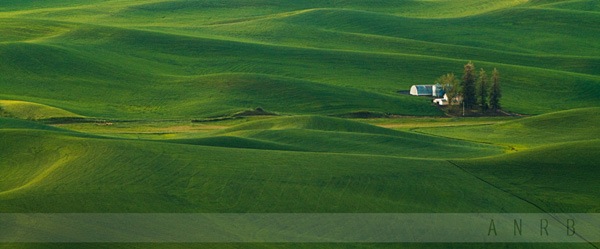
When lines of the horizon intersect with your subject it distracts the viewer and moves the attention away from your subject. It can spoil a great composition. Take some time move your frame up or down, left or right to avoid the horizon merge. In the example picture below, I took extra care not to make the horizon meet the edge of the barn.


8. Lonely subjects are striking

Landscape Composition 88.jpg
Single subjects like trees, barns, buildings, motorcycles almost always make for great compositions. I love pulling them into the frame. Here’s a small collection of such pictures from my archives that have a single tree in the frame.


9. Size Matters

Landscape Composition 99.jpg
Try to include a subject that would give the viewers a scale of the scene in the frame. Use people or objects that let viewers relate size in your composition.


10. Think before you click

Landscape Composition 1010.jpg
As is the case for any type of photography, think before you click the shutter button. Make sure there are no unnecessary objects that would affect your composition. If possible move those objects or try to move yourselves to see if you can avoid them from your composition by moving yourselves.

Following these simple techniques will improve your photography leaps and bounds and keep you ahead of the rest. These illustrations does not fit only for landscape photography but for all other types of photography. The entire collection of my eastern washington pictures can be seen here.


Read more: http://www.digital-photography-school.com/10-landscape-composition-tips-illustrated-with-pictures-from-eastern-washington#ixzz0yfeNFJK5

10 MORE Quick Composition Tips


Balance and Symmetry

Composition Tips 11.jpg
Symmetry makes for a simple, straightforward, balanced composition. Strive for balance by adjusting your composition to establish symmetry with lines, shapes, objects, and color. Balanced and symmetrical pictures are pleasing to the eye.

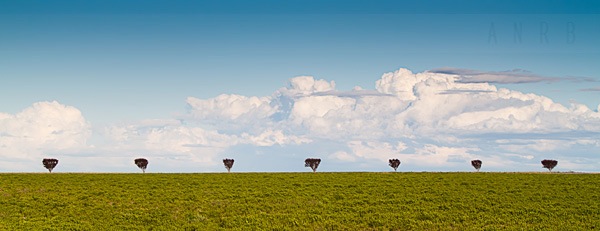
Repeat, Repeat, Repeat

Composition Tips 22.jpg
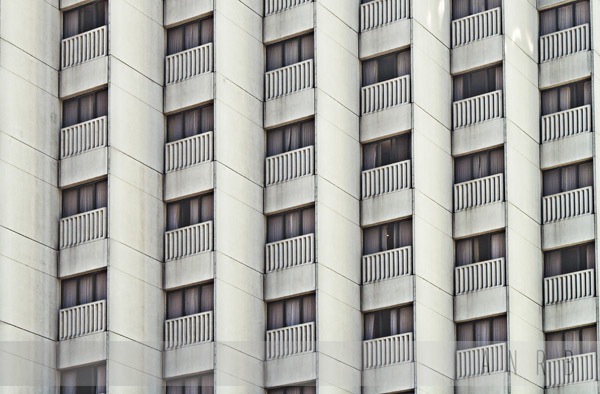
Repetitive objects make great subjects. Whenever you see a series of similar objects repeated over and over, you have found a winning composition. Repetition never fails to impress and create a unique frame.

Keep it Sweet and Simple

Composition Tips 33.jpg
There is a reason why simple is king. Cut the frills, cut the distractions, cut the clutter. The more objects you remove from the picture, the clearer and sharper your story and subject will be to the viewer.

Magnify and Focus

Composition Tips 44.jpg
This is something you should remember in all types of photography. Emphasize your main subject. Frame your subject making it larger, taller, or in sharper focus than other objects.

Add Depth

Composition Tips 55.jpg
Foreground objects add depth to the picture and brings out the subject in the background more effectively. Include objects at 1/3rd the focus to enhance your subject.

Add Nature

Composition Tips 66.jpg
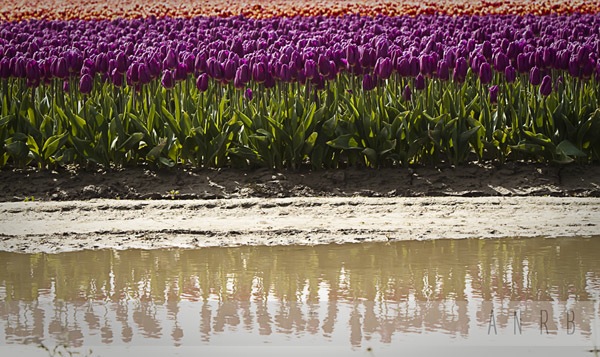
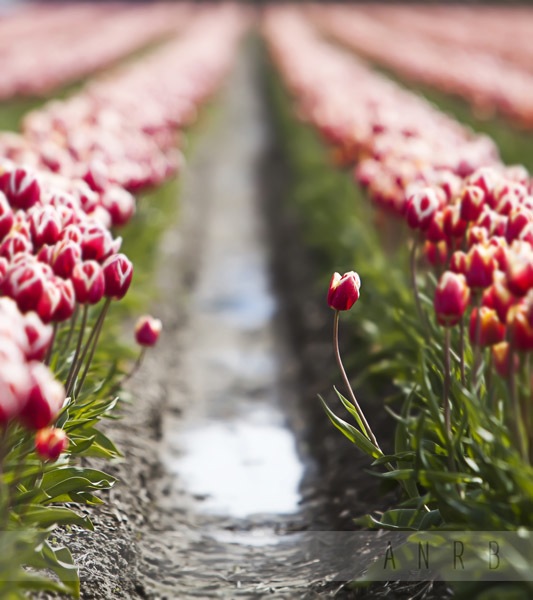
When you are in the field, city or country, look for new ways to add nature to your composition. Scout around and look for natural elements like water, earth, or vegetation to include in the frame. This technique will enhance your picture and make it more effective. I included stagnant water in this picture to bring out reflection of the tulips and add interest.

Portrait or Landscape?

Composition Tips 77.jpg
Use your judgment when shooting horizontal or vertical for every shot. Shoot vertically when you want to enhance tall objects to emphasize height. Shoot horizontally to emphasize width. When in doubt, shoot both. You can decide later which one to keep during post processing. In this picture below an horizontal framing made more sense while a vertical shot would have completely ruined the feel.

What’s My Story?

Composition Tips 88.jpg
One of the most important tips for any shot is to know your story. Ask yourself what you are telling your viewers with your pictures. Are you sharing a feeling, sensation, moment, or theme? If you don’t know the story when you frame the shot, neither will your viewer. Rethink about clicking that shutter until you see it.

You’re Not Done Till You Do it Again

Composition Tips 99.jpg
When you think you are done taking pictures, think again. See what happens when you change your angle, lens, or distance. Surprisingly, in no time you will have whole new perspective.

Cropping is a Good Thing

Composition Tips 1010.jpg
Cropping is photographer’s best friend. Today’s prevalence for digital photography and wide range of editing tools lets you crop pictures to correct mistakes or reframe your composition sitting at home. Be sure to keep cropping in your tool bag when taking and editing pictures.


Read more: http://www.digital-photography-school.com/10-more-quick-composition-tips-illustrated#ixzz0yfe2t1FO

10 Quick, Easy and Intuitive Tips to Improve your Photography


1. Show Action

101.jpg
Use the shutter speed to your advantage and show action in your picture.  If you want to show your subject in motion, slow down your shutter speed.  For a clear crisp look at your subject in one moment of action, increase the shutter speed.

2. Into the Looking Glass

102.jpg
Use reflective surfaces like  water, mirrors, polished surfaces, and glass around your subject to add interest.  Incorporating reflections will bring a whole new look to your shot.

3. High ISO in Low Light

103.jpg
In low light conditions try to take advantage of the high ISO the latest cameras have to offer.  You can create dramatic pictures without using a flash.  Know your limitations though and beware of noise when you bump the ISO to a higher setting than your camera can handle.

4. Avoid Clichés

104.jpg
When you are getting out your camera to photograph an icon, ask yourself “How can I make this my shot unique or different”?  Another version of the same shot that’s been taken by millions may not be worth the time. 

5. Focus it manually

105.jpg
In situations where you are very close to the subject or there is very little light, the camera may have trouble auto focusing.  Help the camera and your photo by focusing the shot yourself with manual settings.  

6. Color creates Mood

106.jpg
Use color to bring out the mood of the scene.  Watch the colors and lighting changes as the day progresses from dawn til dusk.  You’ll be amazed how fast the mood can swing. Use the picture style style in your camera to bump up the saturation and contrast to enhance the shot. 10 minutes earlier this shot would not have been so colorful.

7. Failure is an Option

107.jpg
Don’t get frustrated when your end results don’t match your expectations.  One of the great advantages of digital photography is you did not loose much by trying except some time.  So embrace the uncertainty and take the shot.  You will learn equally from your trials and your triumphs. I had to take at least 50 shots to get this one. 

8. Down on Your Knees

108.jpg
When shooting pictures of subjects lower to the ground, get down on your knees or even the floor to shoot your subject straight on.  Take pictures of kids at eye level.  Remember that taking the shot looking down on your subject is rarely the best perspective.

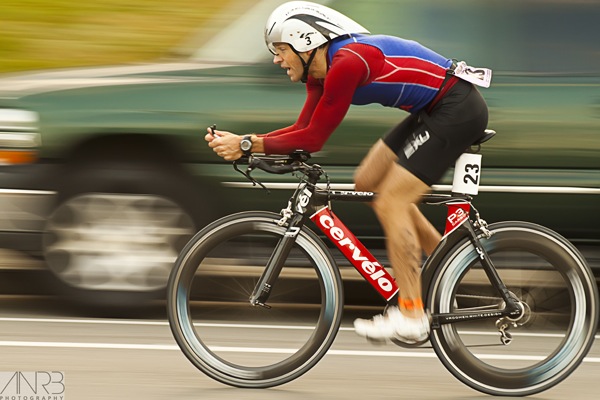
9. Panning is Cool

109.jpg
Panning when done right always ends up looking great.  It’s a great way to show the motion of your subjects.  With a little practice, you can easily master this technique.

10. Patience is a Virtue

110.jpg
Good things come to those who wait.  Wait for the perfect lighting.  Wait for the subject to move slightly to the left.  Wait for the bird to fly away.  Wait for the pinnacle moment.  Regardless of why you are waiting, patience is paramount to getting the best shot and it’s always worth it.


Read more: http://www.digital-photography-school.com/10-quick-easy-and-intuitive-tips-to-improve-your-photography#ixzz0yfdTA0av